Easy DIY: Make Your Own Links Page
I’ve been asked recently what the best Instagram “links” platform is — and there are a lot of options. Per usual — it depends on your business structure.
If you’re a product-based company selling clothing you might use Linkin.bio from Later. It’s easy: Add a link in bio or tag products in Instagram posts to turn your feed into a clickable, optimized landing page.
But for most of us, we are a service-based business with classes or private offerings, and an occasional workshop. In theory you could still sell and promote these through Linkin.Bio but I often find most teachers use LinkTree.
So why am I suggesting you stop use LinkTree?
Their system has crashed, and more than once.
It’s not on brand
It’s another click before they hit your site. (Read: Web Traffic)
Because driving traffic to your own site helps you! And if you already have a website, specifically on Squarespace it’s easy to build following the steps below, and it already looks like you (branding… check!). Those of you who love analytics, and actually use these on LinkTree — you can make the link on your new page a Bit.ly. Between their analytics and Squarespace, you’ll know many clicks you’re getting.
still hesitating? you really should do this because…
It helps people find you, so you get paid. You might have heard of SEO (Search Engine Optimization) before. So I’ll break it down: The more traffic you send to your site, the better Google and Chrome (and others) will rank your site in an online search. We build trust with these search engines every time someone hits our site. This matters when someone goes to type in “Pilates Biz Name “ because large corporations buy search keywords like Yoga and Pilates. We can’t out-buy giants, but we can do our best to be seen.
There are two basic ways to do this on Squarespace. The second can work for any website platform with code that applies to your system.
Create a Cover Page.
Pros: Super simple to update. Cons: No more than 5 links + an email list sign up.
Create a Standard page
Pros: As many links as you want. Cons: Requires a bit more set up, and at least in Squarespace, if you want the buttons to look exactly the same length and remove your header+footer — you need to code that in.
I find that clients, or anyone hitting your Links Page, will only click on first few anyway. So — keep it simple and market the top five things you want drive traffic to.
CREATE A COVER PAGE
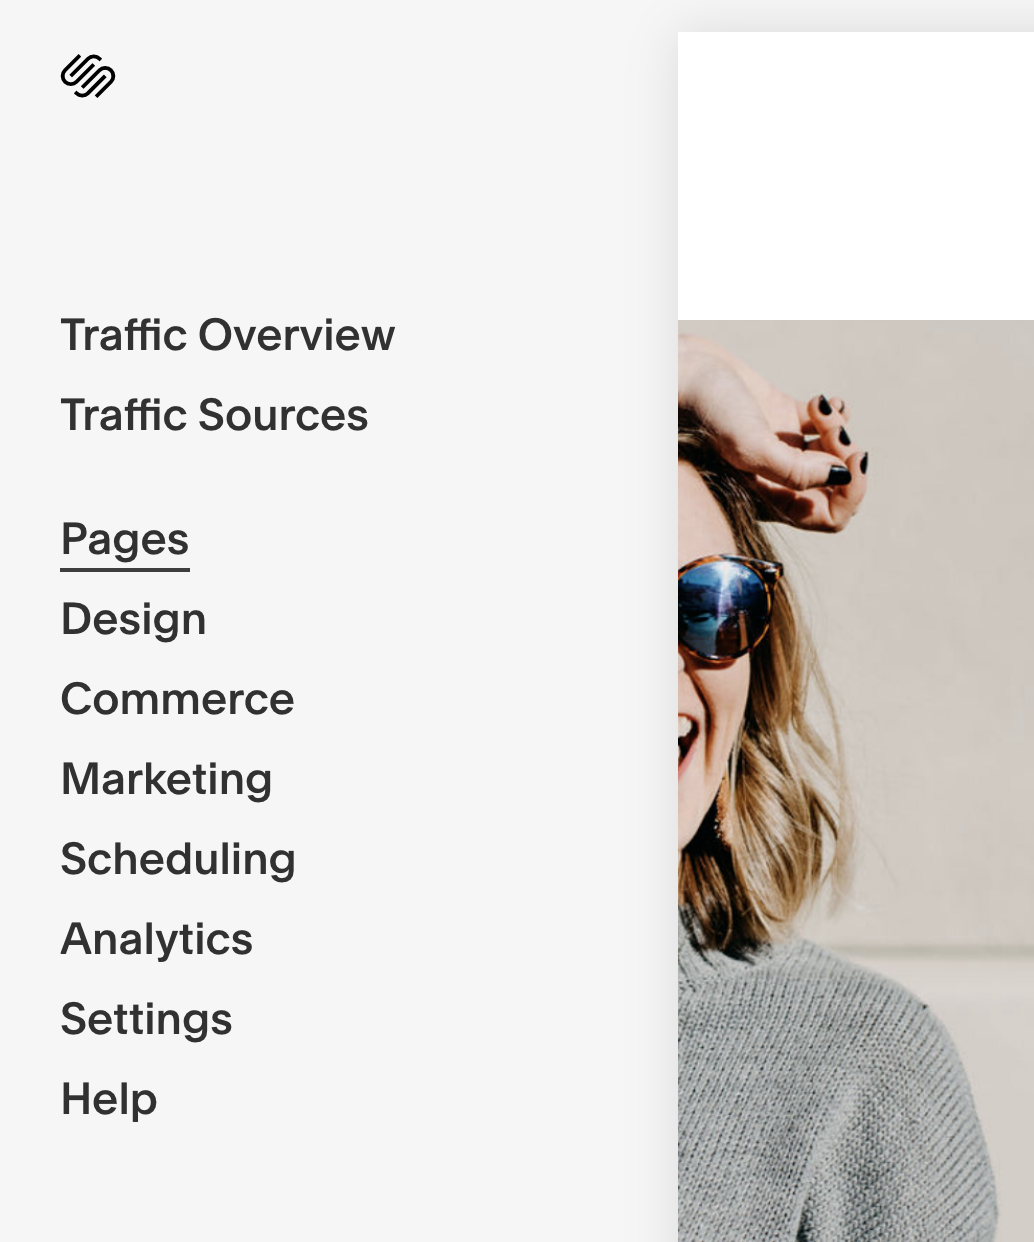
Step One: Log into your Squarespace site and go to pages.
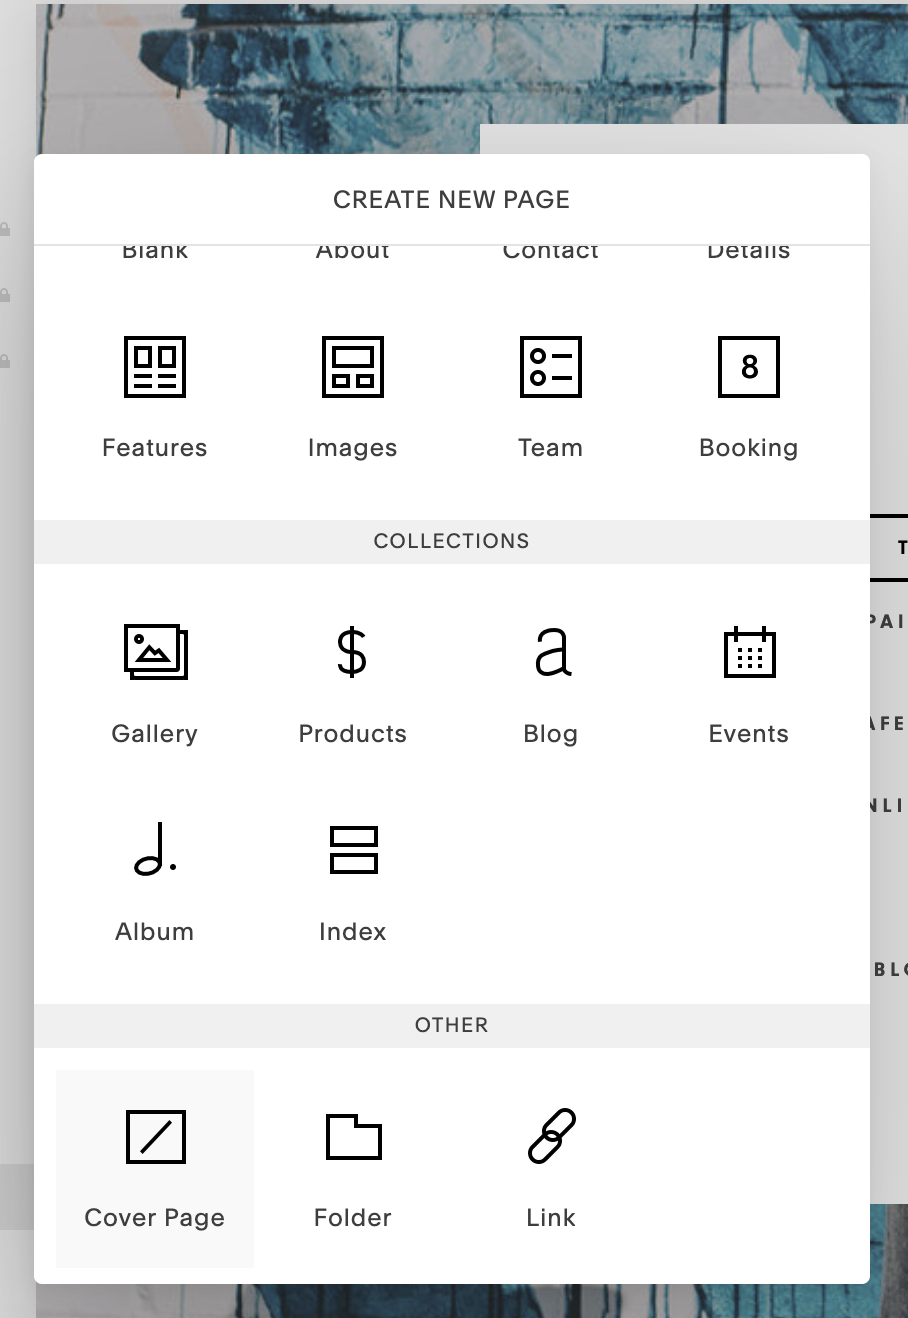
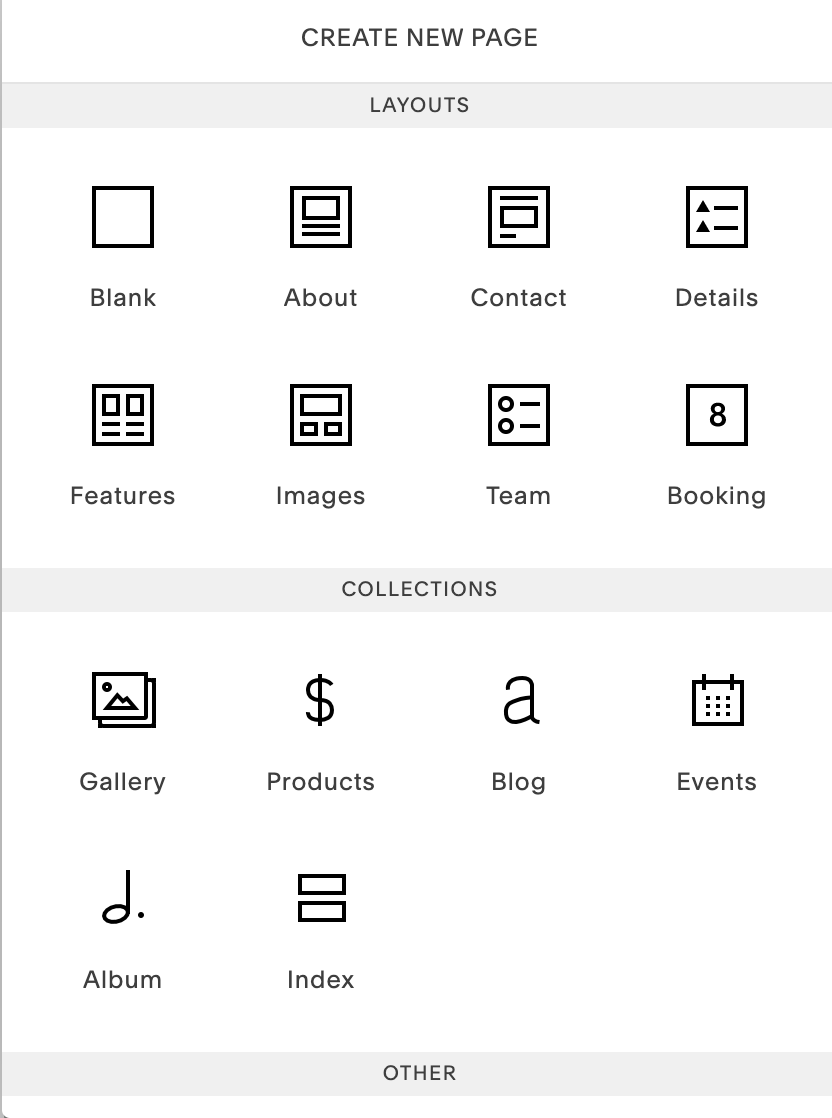
Step Two: Click the + Sign under your “Not Liked” section, and Scroll down to select “Cover Page”.
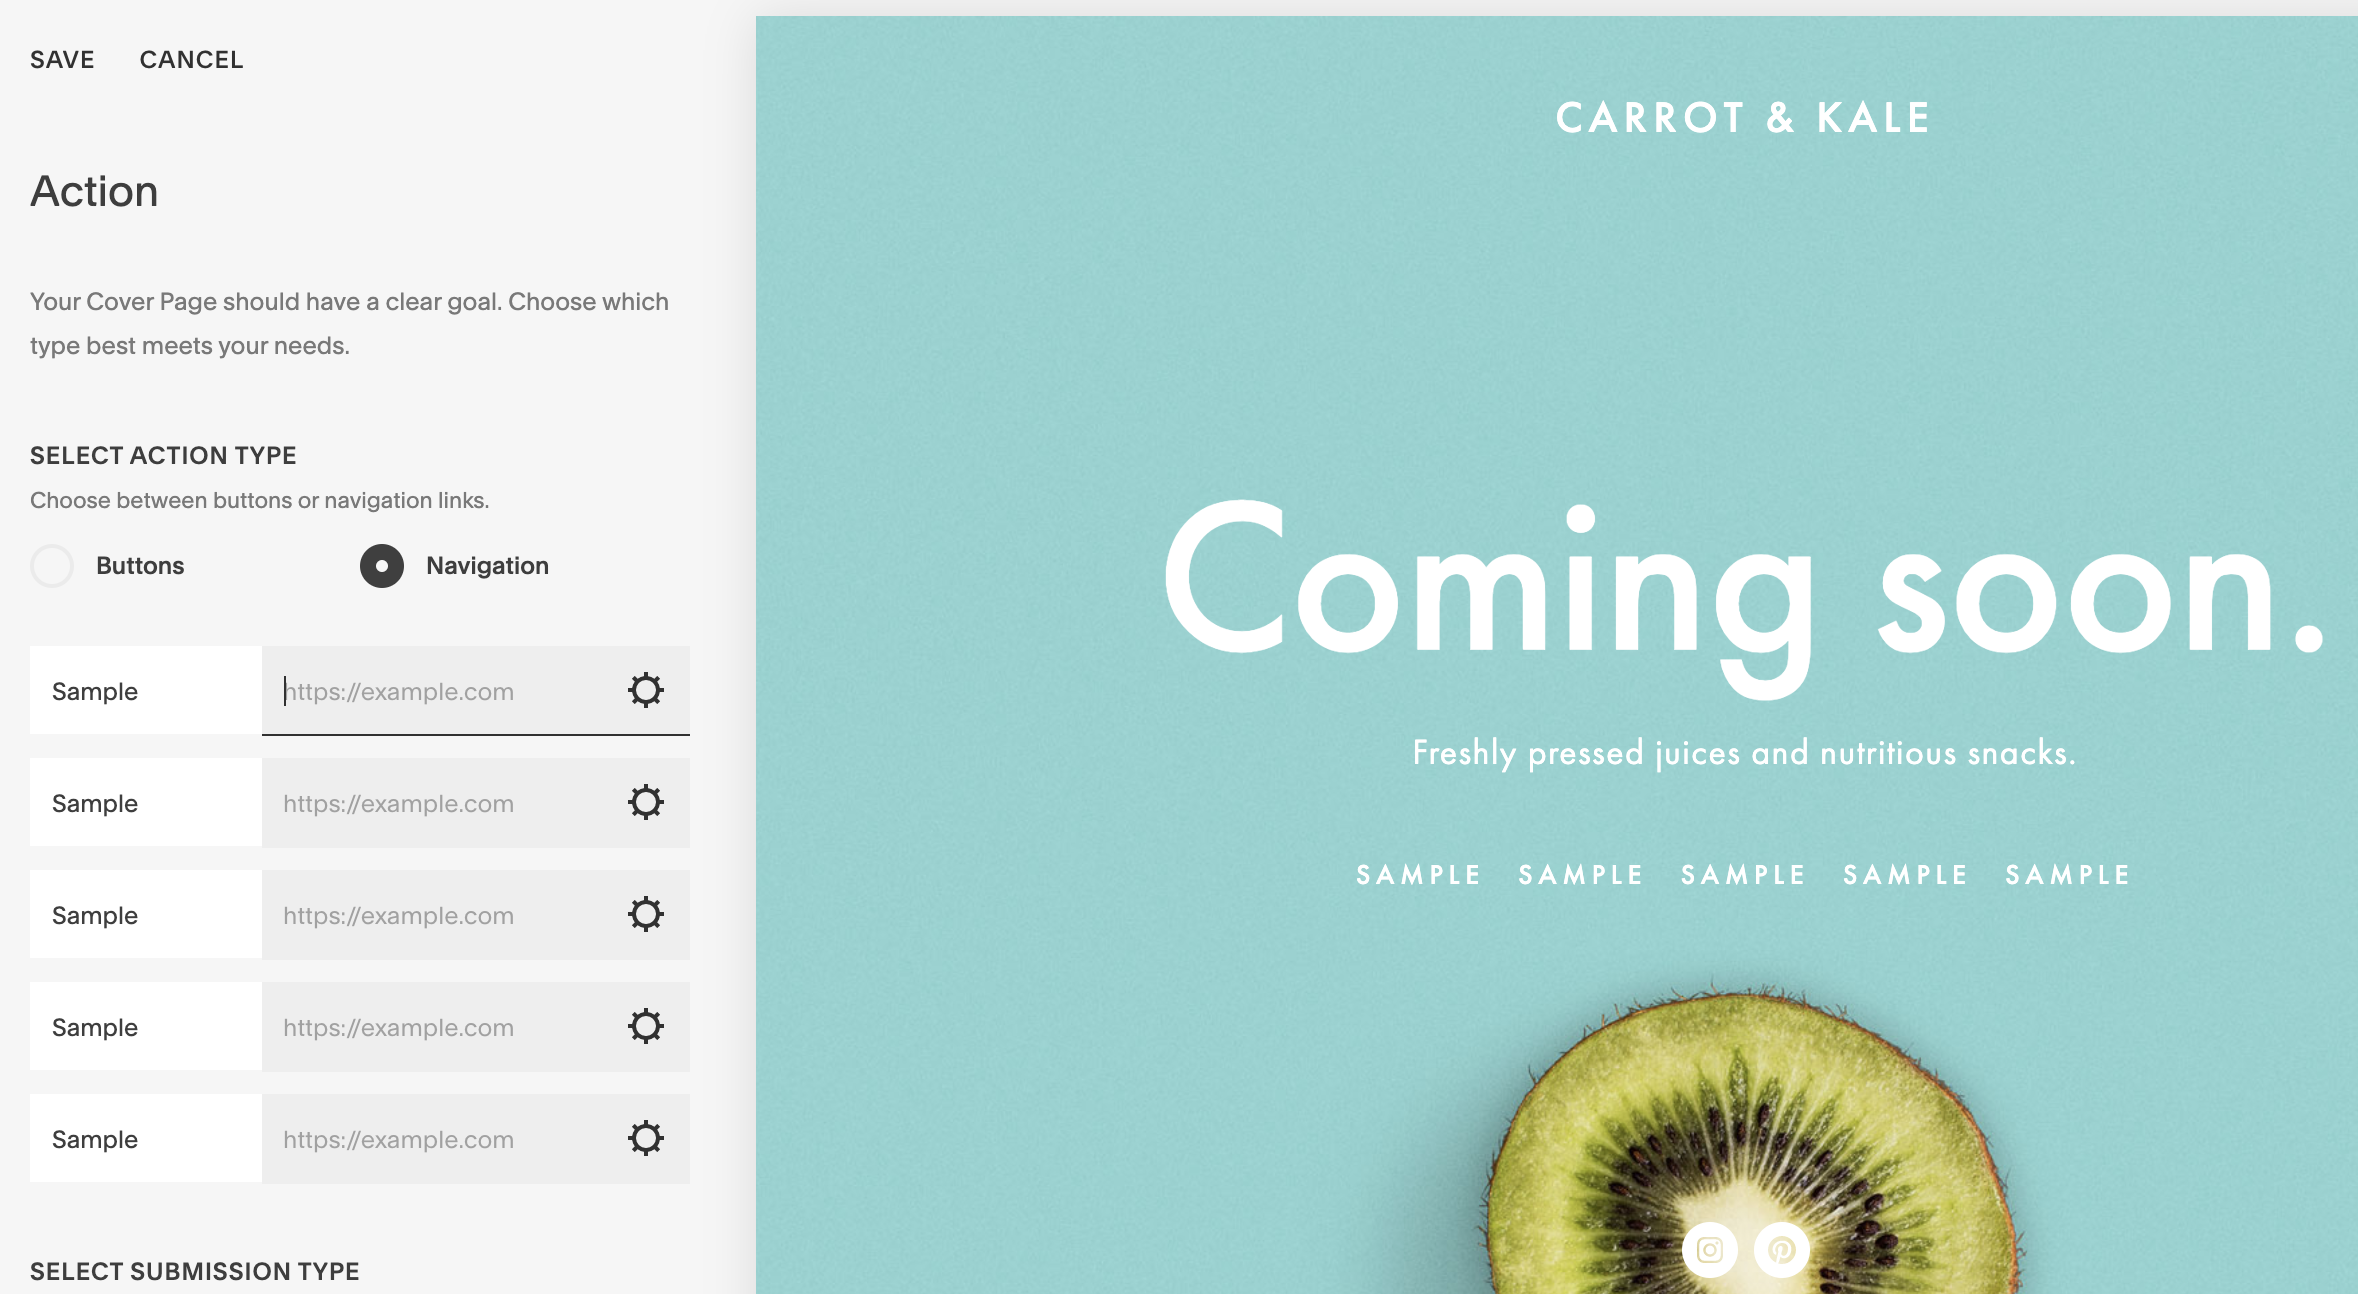
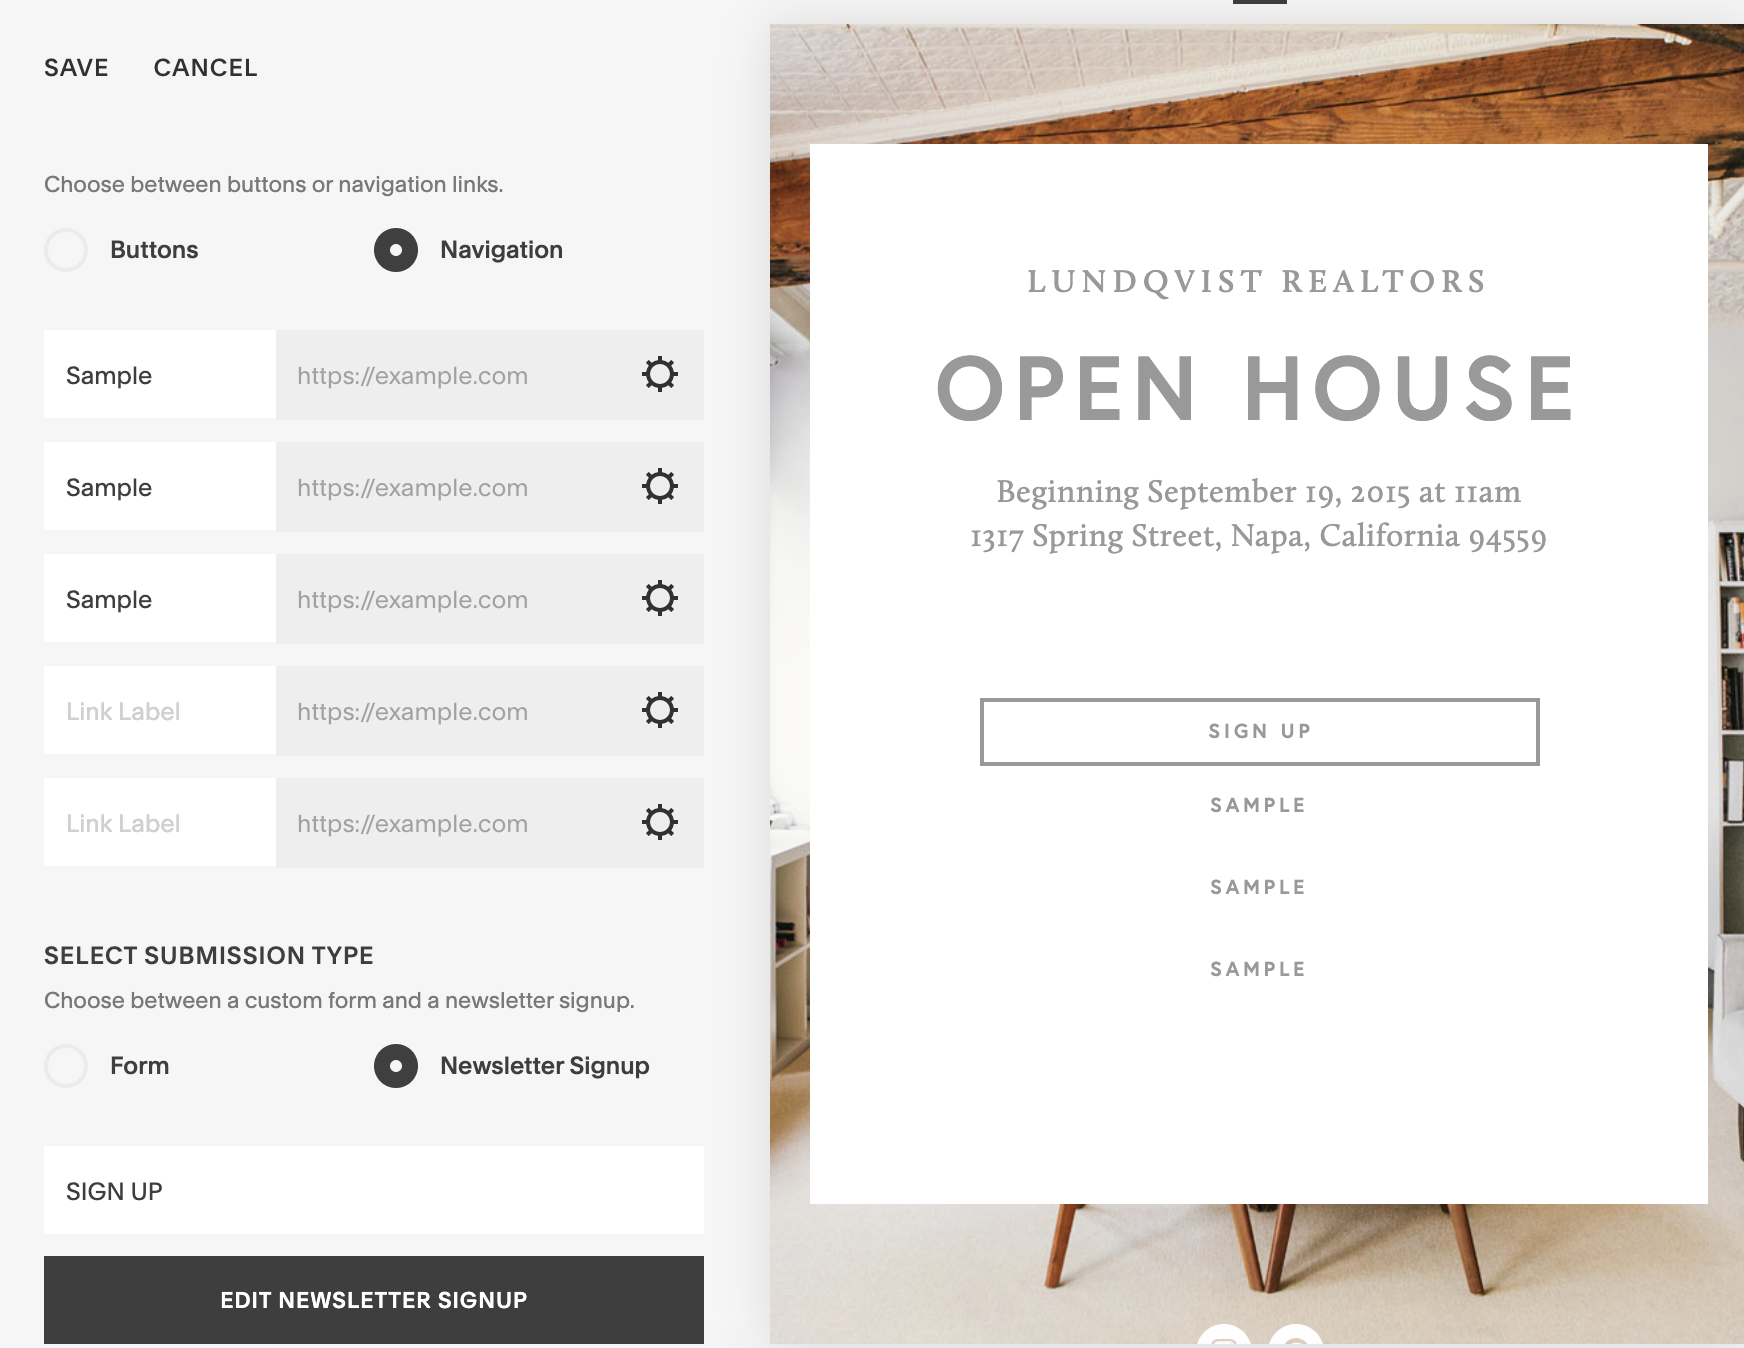
Step Three: Select a Template. My current fav is the Open House layout. Click Action to bring up your link options.
Some templates have a different link layout. Play with what works best for you.
Step Four: Choose “Navigation”. Buttons only allows for two choices. Begin entering your links and titling them. You can also set up a newsletter sign up (this is a great place to help grow your email list). The newsletter button will appear at the top of your links list automatically. Click Save.
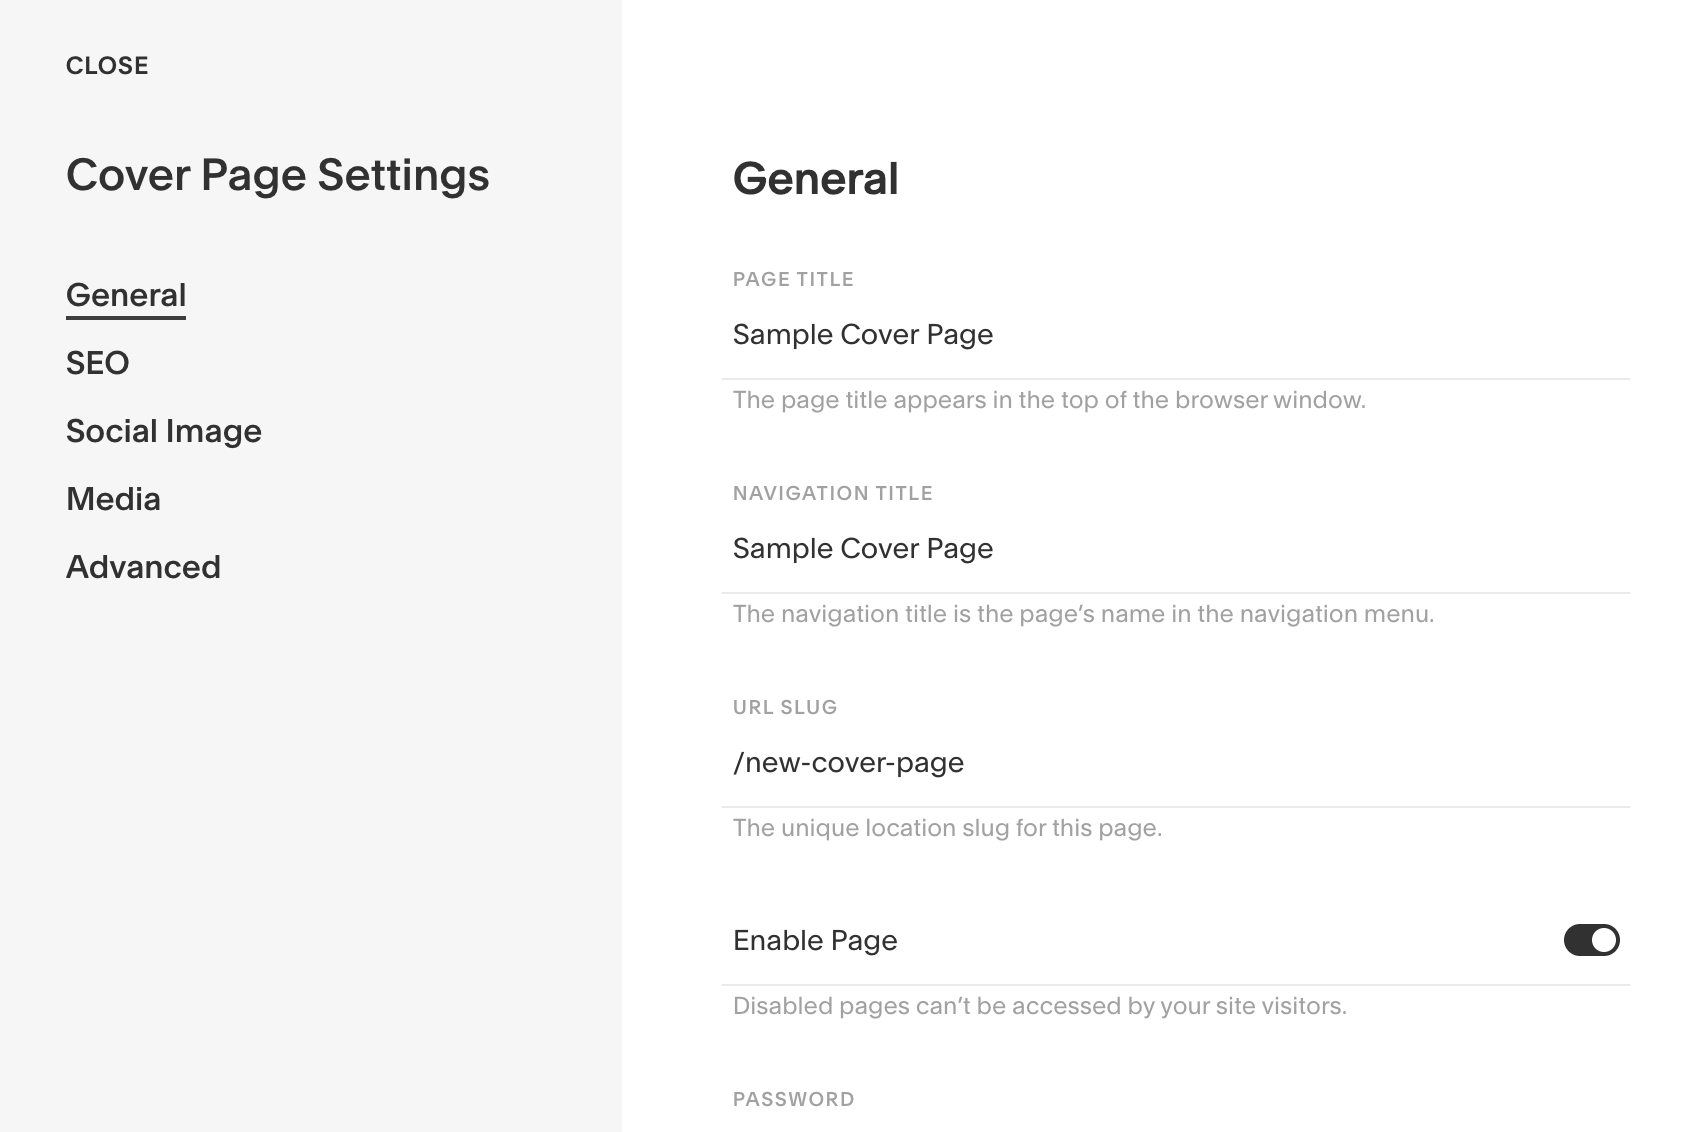
Step Five: Keep branding consistent by including a logo and swap out the main image. All fonts will already be set. Customize the name and URL of your pages by going to the custom-gear button. I suggest “links” or “learn-more” as the URL slug (yes, that dash matters). Enable and save page.
CREATE A standard PAGE
WARNING: If you aren’t willing to tackle the code, just make a single page, add buttons (for your links), and call it a day. It doesn’t have to be perfect, just on brand and functional.
Step One: Log into your Squarespace site and go to pages. Click the + Sign under your “Not Liked” section, and Scroll down to select “About”. I like the About 2/Vertical. On another platform: Create a new page with a very simple layout.
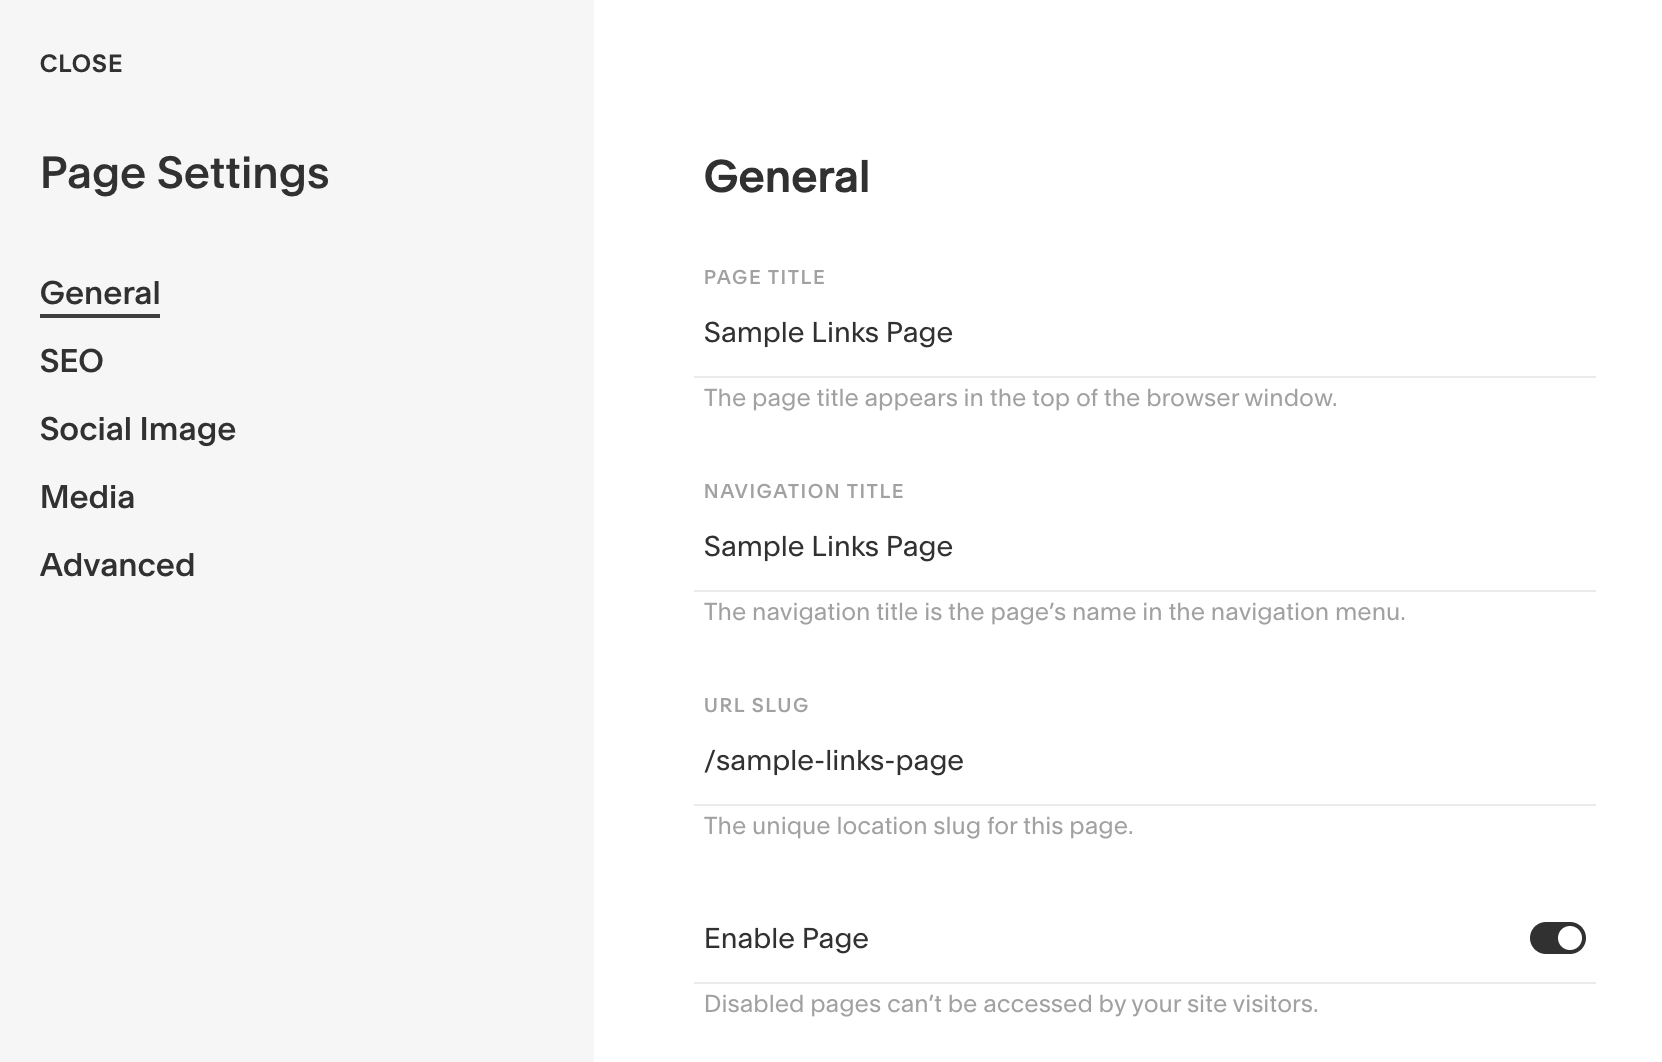
Step Two: Set your page settings and URL. Go to “SEO” and Click to enable “Hide Page from Search Results”. This is so people don’t stumble across it on the internet. We’d much rather them find your home page.
Step Three: Go to the page + adjust the size of the main image by using spacers and replace with a photo of yourself. If you use Canva, you can create the circle with one of their photo frames.
Add your IG handle, and then a few buttons and a social media block.
A note on buttons: I used a SMALL button. You can choose Medium if you prefer. Adjust the style in Design > Site Styles to change the color or size.
[Optional] Step Four Custom Code:
This is code for Squarespace only, and works on the 7.0 BRINE family. There’s also code for 7.1 below that.
We’ll get rid of the header and footer, give the background of the page a nice color. Since we are making these changes on only one page, we’ll need to add the code to the Page Header Code Injection. Click on the page settings and scroll to Advanced.
Paste in the code below and save it. Update your colors by swapping #f0ddd7 and #ffffff with your HEX color of choice. You can also use #white, #black, #grey if needed to keep it super simple.
<style> /* set background color for page */ body, main { background-color: #f0ddd7!important; } /* remove announcement bar, header and footer */ .sqs-announcement-bar-custom-location { display: none !important; } .Header, .Header--top { display: none !important; } .Header-inner, .Header-inner--bottom { display: none !important; } .Footer-inner, .clear { display: none !important; } #footerBlocksTop, #footerBlocksMiddle, #footerBlocksBottom { display: none !important; } /* remove mobile header */ .Mobile-bar { display: none !important; } /* change text color */ p, a, h1, h2, h3 { color: #ffffff !important; } /* remove link underline */ .sqs-block-html p a { border-bottom-style: none; } /* change social icon colors */ .sqs-use--icon { fill: #ffffff !important; } /* style buttons */ .sqs-block-button .sqs-block-button-element--small { color: #808080 !important; width: 80% !important; } </style>
UPDATE for Squarespace 7.1
To remove the header and footer on Squarespace 7.1, use this code instead in the Page Header Code Injection:
<style> header, footer, .Mobile-bar--top { display: none!important; } </style>
Enjoy! I hope you found this useful and if you have any questions let me know!
Hey! We share marketing tips and resources for small business owners, entrepreneurs, fit-bloggers and movement instructors. Learn more about our custom web design services, or check out our free guides to DIY-ing your dream business.
SHARE these biz tips!
Know someone who could benefit from this article? Share it with them:


